Amazing ways to wear Kajal for a glamorous look!
Amazing ways to wear Kajal for a glamorous look!
Kajal, also known as kohl, is one makeup essential we just can’t do without. Many of us feel it to be an everyday grooming tool – we cannot step out of our houses without it. A single sweep of this wonder-product adds definition to your eyes and in seconds, your eyes look bigger, brighter and more defined. That’s why girls all around the world love kajal, because a sweep of it can leave you with eye-catching peepers that speak volumes! By the way, Princess Diana was a huge kajal fan and was particularly fond of the one made by Shahnaz Husain. So not only is kajal popular in India, Pakistan and the Middle East, but globally women have embraced kajal as their go-to make up for eyes.
Firstly, the best eye kajal to opt for is a kajal that is smudge-proof. So, come rain, sweat, happy tears or an impromptu plunge into the pool, your kajal will stay put on your lash lines - a quality shared with waterproof kajal. Also, select a long lasting kajal , one that can brave any day with you. Eye makeup with kajal can be tricky, especially if you are a beginner. Thick, uneven lines morph your eye shape and take away from the beauty of your eyes. We could all use a couple of tips on how to apply kajal without smudging. But before you begin applying kajal, ensure that your eyes are clean, devoid of left-over kajal or eye makeup.
Here are a few ways in which you can achieve myriad looks simply by applying kajal:
1. For an intenselook:
Focus on applying kajal on your waterline as this will give your eyes an intense look. However, if your eyes tend to water uncontrollably or if you wear lenses, apply kajal on your lower lash line instead of on your waterline. Now, how to apply thick kajal on lower lid? Use your left hand to pull down your under-eye area gently and expose your waterline. Now, begin applying kajal, starting from the outer corner of your eye and moving inwards towards your tear duct area.Apply kajal in repetitive, short strokes as this imparts more color to your waterline and will also prevent your lines from going askew. Rest your hand on your cheeks for extra support.
2. As an alternative toeyeliner:
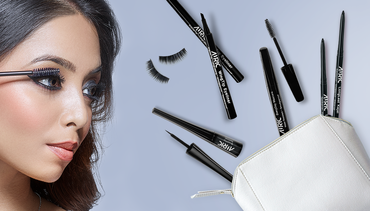
When you want to replace eyeliner with a long lasting waterproof kajal , make a thin line on your upper lid by starting from the inner corner of your eye and slowly moving outwards. Stop at the end of your outer corner. It will add more drama to your eyes. Oh and with three new intensive shades Auric Earthy Brown Kajal , Auric Midnight Blue Kajal , Auric Serene White Kajal to add to the range, check out Auric’s Intensiv Kajal to add volume to your look.
3. Winged eyelook:
If your kajal is sharp enough,you can use this to flick the upper eye line to for mawinged look.It could be easier withAuric’s liquid eye liners,but the same stunning winged look can be achieved by a kajal too!. To create this look,apply kajal on your upper lash lines,starting from the inner corner and moving outwards just like the basic application. From the tip of the outer corner of your eyes, extend the line upwards. Thicken out the line by applying kajal in short strokes.
4. Double winged eyelook:
To get this style, draw out the winged-eye look on your upper lash lines. On your lower lash lines, apply a fine line of Auric Intensiv kajal moving from the inner corner to the outer corner and give the line a gentle downward curve at the outer edge.
5. KittenEye:
Start by applying a thin line from the inner corner of your eye and while moving outwards you can make the line slightly thicker. Apply it in short quick strokes. When you reach the outer corner, flick it out slightly in a straight line, but upwards.
6. FishtailEyes:
One from the indian eye makeup tips with kajal. If you fancy the fishtail look (recall Sharmila Tagore back in the day) then do a similar flick slightly downwards with the kajal to form a fishtail-like effect at the outer corners of your eyes: very retro and beautifully bold!
7. DoeEyes:
Doe eye makeup is a fashion trend from the 60s and 70s. But it is a style practiced by our Bollywood beauties. You need to apply thick kajal on both your lash lines and make a slight ‘u’ at the corner of your eyes. Applying kajal in this style gives you a delicate look.
8. Semi-linedEyes:
Use the angled tip of your kajal pencil (just make one part of the tip flat and the other pointed) to trace your lash line, kicking the sharp end of the kajal pencil out at the corner to create a winged effect. Then, using the same angled kajal technique, draw a line from the outermost part of the cat-eye to the halfway point of your bottom lash line and you’re done!
9. Infinity-linedeyes:
Tory Burch made this look very popular. Start with applying a sheer wash of brown matte shadow as your base from lid to crease. Next, line the inner upper and lower rims of your eyes — the entire way around your eye — with a waterproof black kajal liner. Then, gently rub your eyes to give it a slept-in look and take away any excess on your skin with a gentle cream that also leaves behind a sheen.
10. SmokeyEyes:
It is the easiest to get smokey eyes using kajal! Swipe a thick line of kajal directly over the upper lash line of the eye, moving from the inner corner to the outer corner.Try to keep the line evenly thick, but don’t worry about making it perfectly even or smooth. Most imperfections created during this step will be hidden later. You may need to pass over the upper lash line multiple times to make the line adequately thick. Take a fluffy eyeshadow brush and smudge the kajal upward, working it through the crease and toward the brow bone. Work in vertical strokes that are perpendicular to the lash line. You’ll need to work across the initial line of kajal in short increments, continuing until the entire line has been blended upward. Note that the kajal should naturally lighten as you brush it upward, creating the desired gradient effect. To further accent the gradient, draw another thin line of kajal over the upper lash line, working from the inner corner to the outer edge. You do not need to blend this line or thicken it. The purpose is merely to darken the starting edge of the gradient. Once you finish drawing in this final line of kajal, the look is complete. Highlight your lashes with mascara and you are done!


